Learning Latte Art: the Heart, Step by Step
The heart is the first pattern almost every barista learns, because it contains all the basic movements of latte art. Once you can pour it reliably, the tulip and rosetta are just variations of the same technique.
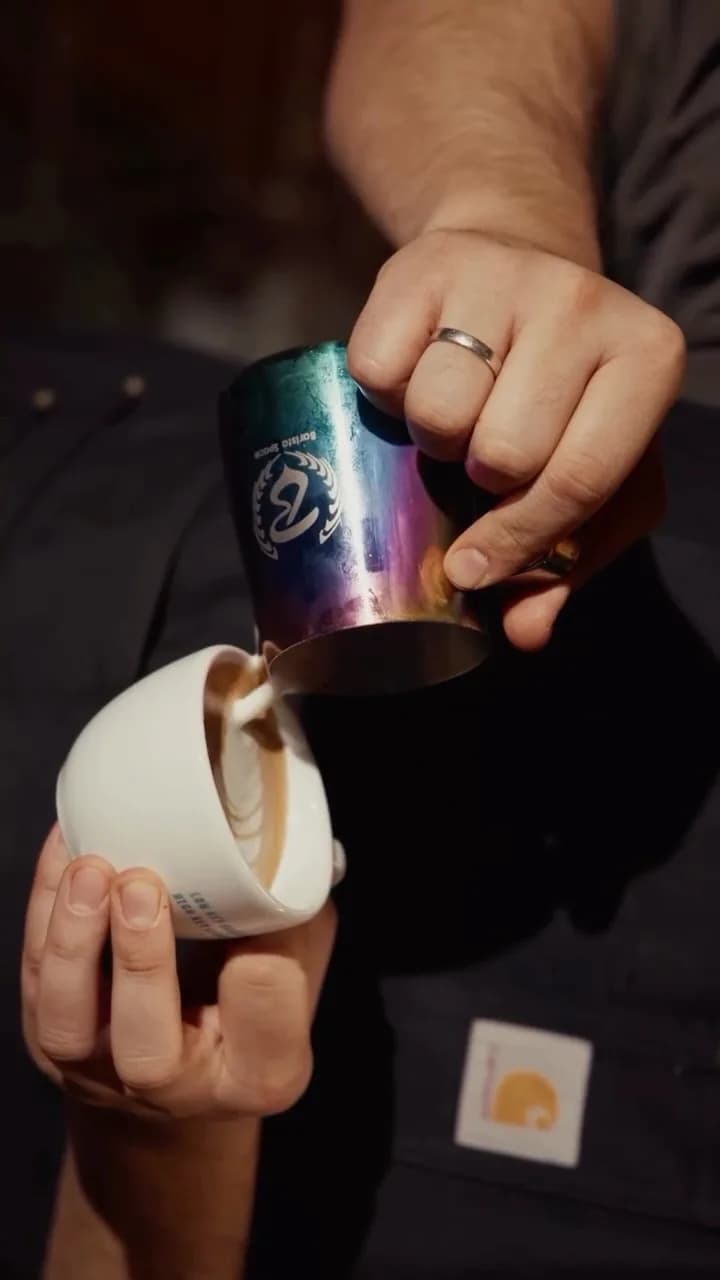
The basics: crema and microfoam
Latte art happens when white milk foam becomes visible on the brown crema of the espresso. That takes two things of good quality. First, a freshly pulled espresso with an intact, hazelnut-brown crema. If the crema is thin or pale, there is no contrast and the foam runs. How to pull a clean shot is explained in our portafilter espresso guide.
Second, microfoam: glossy, without visible bubbles, with the consistency of liquid wall paint. Foam that is too stiff can’t be shaped and sits on the surface as a blob; foam that is too thin sinks and draws nothing. For a heart you need about as much foam as for a flat white or a fairly flat cappuccino. How to get there is covered in our guide to milk frothing with a steam wand.
- Pull the espresso right before pouring; the crema loses tension after about a minute.
- Keep swirling the milk in the jug until you pour, so foam and liquid milk don’t separate.
- Use a wide cup with a round bottom, to start with about 180–250 ml in volume. It is more forgiving than a narrow, tall glass.
- A jug with a pointed spout, about 350 ml for one cup.
Cup angle, pouring height and flow rate
Hold the cup by the handle or the body and tilt it towards the jug, at the start roughly 30–45 degrees as a guideline. This creates a deep spot where the espresso collects, giving the pattern room to spread later. As the cup fills, slowly bring it back upright.
Pouring height decides whether the milk dives under the crema or stays on top. From about 5–10 cm with a thin stream it sinks and forms the base without turning the surface white. Only when you bring the jug very close to the surface, the spout almost touching the crema, does the foam float on top and draw.
Flow rate determines how much foam comes with it. While filling, a steady, thin stream is enough. To draw, increase the flow noticeably, because a hesitant stream brings mostly liquid milk and hardly any foam out of the jug. With the heart you change all three, tilt, height and flow, at the same time. That is exactly what makes it such a good exercise.
Step by step: pouring the heart
- Pull the espresso into the pre-warmed cup, froth the milk, tap and swirl it until it shines.
- Tilt the cup towards the jug. Hold the jug about 5–10 cm above the cup.
- Pour a thin stream into the middle of the crema while making small circles, so milk and espresso blend evenly. The surface stays brown.
- Keep pouring until the cup is about half to two-thirds full.
- Lower the jug in one movement until the spout almost touches the surface, and increase the flow at the same time. Aim for the centre of the cup or a point just behind it.
- A white dot appears. Hold your position and keep pouring so it grows and spreads into a round circle.
- Slowly bring the cup upright as you go. The circle grows and pushes towards the rim.
- When the cup is almost full, lift the jug and reduce the flow so only a thin stream remains.
- With this thin stream, draw straight through the middle of the circle towards you. This cut forms the notch at the top and the point at the bottom.
- Stop the stream at the near rim, don’t pour past it.
The final cut decides the shape. It should be quick and straight and come from a little height, so only a small amount of foam follows. If you cut through too low or too slowly, you draw a wide white stripe instead of a fine point.
Typical mistakes with the heart
| Mistake | Cause | Fix |
|---|---|---|
| No white appears at all | Jug too high, flow too low or foam too thin | get closer to the surface, increase the flow, draw in a little more air when frothing |
| Shapeless white blob | Foam too stiff or too much air drawn in | stretch for less time, texture longer, swirl the milk well before pouring |
| Surface turns white while filling | poured too low or too fast at the start | pour the base from higher up with a thin stream |
| Heart is lopsided | stream off-centre or cup turned while bringing it upright | keep the cup straight, cut exactly through the middle |
| Wide, smeared point | cut too low, too slow or with too much flow | lift the jug, thin stream, cut through quickly |
| Pattern blurs or sinks | milk has separated or crema is too weak | pour right after frothing, pull the espresso fresh |
| No room for the pattern | started drawing too late | lower the jug earlier, when the cup is about half full |
Change only one thing after each cup. If you adjust foam, height and timing all at once, you can’t tell what brought the improvement. A photo of every attempt helps you spot patterns in your own mistakes.
Practising with water and washing-up liquid
Milk and espresso for every practice attempt add up quickly. A common method is to train the pouring movement with water and a drop of washing-up liquid. Fill the jug with cold water as usual, add a tiny drop of washing-up liquid and froth it with the steam wand. This creates a foam that behaves much like microfoam when you pour.
You can then pour into a cup of water with a little cocoa or a drop of food colouring stirred in, so the white shows up. The result is of course not for drinking. Rinse wand, jug and cup thoroughly afterwards. This method mainly trains hand position, lowering and the cut; it doesn’t replace the feel of real milk foam.
After the heart: tulip and rosetta
Once the heart works, the next patterns follow naturally. The tulip is made of several stacked heart shapes. You set a first white dot, briefly interrupt the flow, set the next dot behind it and push it into the first. Finally comes the same cut as with the heart. The tulip mainly trains starting and stopping the flow in a controlled way.
The rosetta, the leaf pattern, comes from an even side-to-side movement of the jug. You start close to the surface in the middle, wiggle the jug back and forth in small swings and slowly pull it back as you go. Finally you lift and draw the cut through the whole leaf. The rosetta needs an even flow and very fine foam, which is why it is usually the third pattern.
- Heart: basic shape, lowering, letting it grow, the cut.
- Tulip: several dots one after another, starting and stopping the flow.
- Rosetta: wiggling motion, pulling back, even flow.
Learning latte art with guidance
A lot of latte art can be practised alone, but some things only become clear when someone watches your hand position. The Rocademy offers a latte art course at our café in Maxvorstadt, where milk foam and pouring technique are practised. For daily practice at home the basic rules stay the same: good espresso, fine foam, one change per cup.
Frequently asked questions
Which milk is best for latte art?
Fresh whole milk with 3.5 % fat is easiest to start with, because it forms stable, glossy microfoam. Oat drinks work in the barista edition, but behave a little differently and are less forgiving.
Why doesn’t a white dot appear when I pour?
Usually the jug is too far from the surface or the flow is too weak. Lower the spout almost onto the crema and pour more firmly. If the foam is very thin, draw in a little more air when frothing.
How full should the cup be before I start drawing?
As a guideline about half to two-thirds. If you start earlier, the foam still sinks; if you start later, there is no room for the heart to spread.
Do I need a portafilter machine for latte art?
For clear patterns, yes, or at least a strong espresso with crema and real microfoam. With foam from a French press simple shapes are possible, but they rarely turn out as clean.
How long does it take to pour a heart?
That varies a lot. With regular practice, recognisable hearts often appear after a few dozen cups. What matters is consistently changing only one thing per attempt.